What Should I Know Before Drawing a Turkey? A Comprehensive Guide
Drawing a turkey can be a fun and rewarding artistic endeavor, whether you’re a seasoned artist or just starting out. However, before you put pencil to paper, there are several key things you should know to ensure your turkey drawing is both accurate and visually appealing. This comprehensive guide will cover everything from understanding turkey anatomy to choosing the right art supplies, providing you with the knowledge you need to create a stunning turkey drawing. Whether you’re aiming for realism or a more stylized approach, understanding the fundamentals is crucial. So, let’s dive into what you should know before drawing a turkey.
Understanding Turkey Anatomy
Before you start drawing a turkey, it’s essential to understand its basic anatomy. Turkeys have distinct features that set them apart from other birds. Familiarizing yourself with these features will help you create a more realistic and convincing drawing. Key anatomical elements to consider include:
- Head and Neck: Turkeys have a relatively small head compared to their body size. The neck is long and flexible, allowing for a wide range of motion. Pay attention to the wattle (the fleshy growth under the beak) and the snood (the fleshy appendage that hangs over the beak). These features are unique to turkeys and add character to your drawing.
- Body: The turkey’s body is large and oval-shaped. Note the proportions of the body in relation to the head and neck. The chest is broad, and the back slopes downwards towards the tail.
- Wings: Turkey wings are large and powerful, allowing them to fly short distances. When at rest, the wings fold neatly against the body. Observe how the feathers overlap and the subtle curves of the wing.
- Tail: The turkey’s tail is a prominent feature, especially in males (toms). It fans out into a semi-circular shape and is composed of many feathers. The tail feathers are often brightly colored and patterned.
- Legs and Feet: Turkeys have strong legs and feet adapted for walking and scratching. They have three toes pointing forward and one pointing backward. The legs are covered in scales, and the feet have sharp claws.
Studying reference photos of turkeys from different angles can be incredibly helpful in understanding their anatomy. Pay attention to the subtle details and proportions to create a more accurate drawing of a turkey.
Choosing the Right Art Supplies
The art supplies you choose can significantly impact the final result of your turkey drawing. Here are some recommended supplies:
- Pencils: A range of pencils with varying hardness (e.g., HB, 2B, 4B) is ideal for sketching and shading. Softer pencils (e.g., 4B) are great for creating dark values, while harder pencils (e.g., HB) are better for lighter lines and details.
- Eraser: A kneaded eraser is excellent for lifting graphite and creating highlights. A regular eraser is useful for removing larger areas of graphite.
- Paper: Smooth paper is suitable for detailed drawings, while textured paper can add depth and interest to your artwork. Experiment with different types of paper to find what works best for you.
- Blending Tools: Blending stumps, tortillions, or even your finger can be used to smooth out shading and create gradients.
- Colored Pencils or Markers (Optional): If you want to add color to your turkey drawing, colored pencils or markers can be used. Choose high-quality materials for vibrant and long-lasting colors.
Consider the size of your paper as well. A larger surface area allows for more detail and a greater range of values. Before you begin drawing a turkey, ensure you have all your supplies ready and organized.
Mastering Basic Drawing Techniques
Before attempting to draw a turkey, it’s essential to have a good grasp of basic drawing techniques. These techniques will help you create a more realistic and visually appealing drawing:
- Sketching: Start with a light sketch to establish the basic shapes and proportions of the turkey. Use light, loose lines that can be easily erased.
- Proportion: Pay close attention to the proportions of the turkey’s body parts. Use reference photos to guide you and make sure the head, neck, body, wings, and tail are all in the correct proportions to each other.
- Shading: Shading is crucial for creating depth and dimension in your drawing. Use different pencil grades to create a range of values, from light highlights to dark shadows. Observe how light falls on the turkey and use shading to replicate this effect.
- Texture: Turkeys have a variety of textures, from the smooth feathers to the rough scales on their legs. Use different drawing techniques to replicate these textures. For example, short, overlapping strokes can be used to create the appearance of feathers.
- Details: Once you have established the basic shapes and shading, add details such as the eyes, beak, wattle, and snood. These details will bring your turkey drawing to life.
Practice these techniques on simpler subjects before attempting to draw a turkey. The more you practice, the more confident you will become in your drawing abilities. Think of drawing a turkey as an exercise in observation and replication.
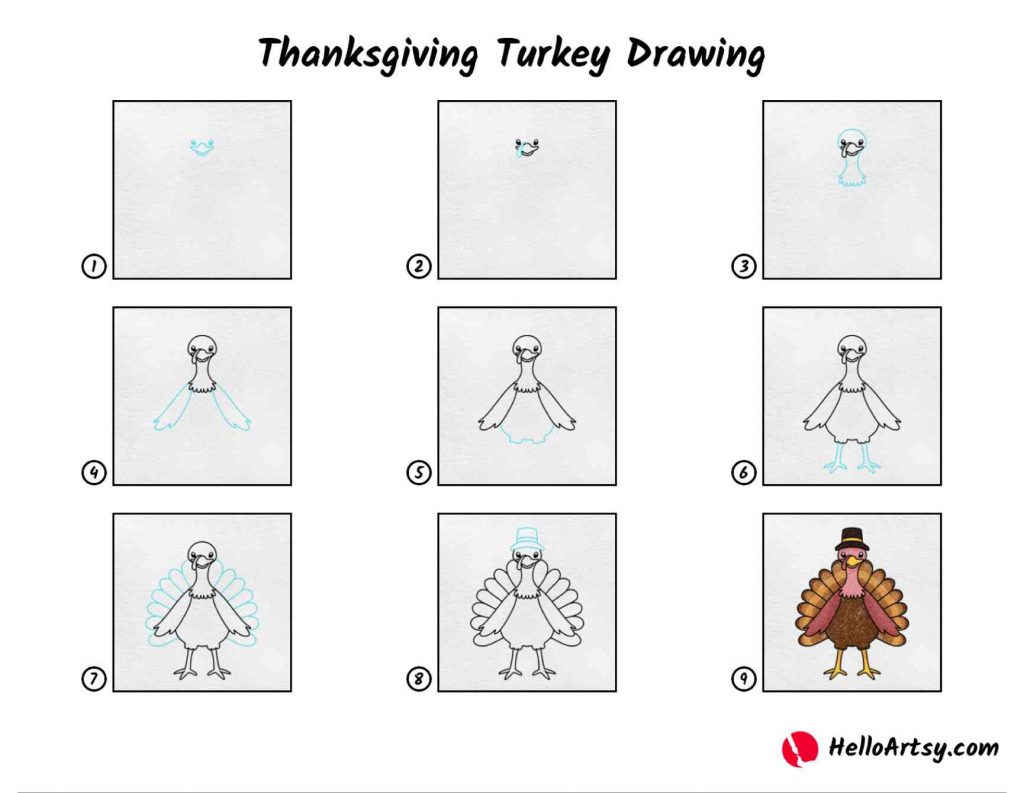
Step-by-Step Guide to Drawing a Turkey
Here’s a step-by-step guide to help you draw a turkey:
- Start with Basic Shapes: Begin by sketching the basic shapes of the turkey’s body, head, and neck. Use light, loose lines to create a rough outline.
- Refine the Outline: Refine the outline of the turkey, paying attention to the proportions and curves of the body. Add details such as the wattle, snood, and beak.
- Draw the Wings and Tail: Sketch the wings and tail, making sure they are in proportion to the body. Pay attention to the shape and arrangement of the feathers.
- Add Details: Add details such as the eyes, legs, and feet. Use reference photos to guide you and make sure the details are accurate.
- Shade the Drawing: Use different pencil grades to shade the drawing, creating depth and dimension. Pay attention to how light falls on the turkey and use shading to replicate this effect.
- Add Texture: Add texture to the drawing by using different drawing techniques to replicate the appearance of feathers and scales.
- Final Touches: Add any final touches to the drawing, such as highlights and shadows. Erase any unnecessary lines and refine the details.
Remember to take your time and be patient. Drawing a turkey takes practice, so don’t be discouraged if your first attempt isn’t perfect. Keep practicing and you will eventually improve your skills.
Common Mistakes to Avoid
Here are some common mistakes to avoid when drawing a turkey:
- Incorrect Proportions: One of the most common mistakes is drawing the turkey’s body parts out of proportion. Pay close attention to the proportions of the head, neck, body, wings, and tail.
- Lack of Shading: Shading is crucial for creating depth and dimension in your drawing. Don’t neglect shading, as it can make your drawing look flat and lifeless.
- Ignoring Details: Details such as the eyes, beak, wattle, and snood are important for bringing your turkey drawing to life. Don’t neglect these details, as they can make a big difference in the overall appearance of your drawing.
- Using Harsh Lines: Avoid using harsh, dark lines in your drawing. Use light, loose lines that can be easily erased and refined.
- Not Using Reference Photos: Reference photos are essential for drawing a realistic turkey. Don’t try to draw from memory, as you are likely to make mistakes.
By avoiding these common mistakes, you can improve the quality of your turkey drawings and create more realistic and visually appealing artwork. Before you begin drawing a turkey, remind yourself of these points.
Tips for Adding Realism
If you want to add realism to your turkey drawing, here are some tips:
- Study Reference Photos: The more you study reference photos, the better you will understand the anatomy and details of a turkey.
- Pay Attention to Light and Shadow: Observe how light falls on the turkey and use shading to replicate this effect. Pay attention to the highlights and shadows, as they can add depth and dimension to your drawing.
- Use a Variety of Textures: Turkeys have a variety of textures, from the smooth feathers to the rough scales on their legs. Use different drawing techniques to replicate these textures.
- Add Details: Details such as the eyes, beak, wattle, and snood are important for bringing your turkey drawing to life. Add as many details as possible to make your drawing look more realistic.
- Practice, Practice, Practice: The more you practice, the better you will become at drawing realistic turkeys. Don’t be discouraged if your first attempts aren’t perfect. Keep practicing and you will eventually improve your skills.
Drawing a turkey realistically requires patience and attention to detail. [See also: Drawing Realistic Birds] By following these tips, you can create a stunning and lifelike representation of this fascinating bird.
Exploring Different Styles
While realism is a popular approach, there are many other styles you can explore when drawing a turkey. Consider these options:
- Cartoon Style: Simplify the turkey’s features and exaggerate certain characteristics for a fun and whimsical look.
- Abstract Style: Focus on shapes, colors, and patterns rather than realistic representation.
- Geometric Style: Break down the turkey into geometric shapes and create a modern, stylized drawing.
- Line Art: Create a drawing using only lines, without shading or color.
Experimenting with different styles can help you develop your own unique artistic voice and create truly original turkey drawings. The key is to have fun and explore your creativity. Before drawing a turkey, consider which style best suits your artistic vision.
Conclusion
Drawing a turkey can be a rewarding and enjoyable experience. By understanding turkey anatomy, choosing the right art supplies, mastering basic drawing techniques, and avoiding common mistakes, you can create a stunning turkey drawing that you’ll be proud of. Whether you’re aiming for realism or a more stylized approach, the knowledge and skills you’ve gained from this guide will help you succeed. So grab your pencils, paper, and reference photos, and start drawing! Remember to practice, be patient, and most importantly, have fun. The process of drawing a turkey is just as important as the final result. With dedication and practice, you’ll be creating impressive turkey artwork in no time. Happy drawing! [See also: Beginner Drawing Tips]

