Painting Rain with Acrylics: A Comprehensive Guide for Artists
Capturing the ethereal beauty of rain on canvas is a challenge many artists embrace. The shimmering reflections, the muted colors, and the sense of movement all contribute to a captivating scene. This guide offers a comprehensive exploration of painting rain with acrylics, covering everything from essential materials and techniques to tips for creating realistic and evocative rainy day paintings. Whether you’re a beginner or an experienced artist, this article provides valuable insights to help you master the art of depicting rain using acrylic paints.
Understanding the Elements of a Rainy Scene
Before diving into the practical aspects of painting rain with acrylics, it’s crucial to understand the key elements that define a rainy scene. These include:
- Atmospheric Perspective: Rain creates a sense of depth by blurring distant objects and reducing their color intensity.
- Reflections: Wet surfaces reflect light, creating shimmering highlights and distorted images.
- Color Palette: Rainy days often feature muted colors, with grays, blues, and greens dominating the scene.
- Movement: Capturing the feeling of falling rain is essential for conveying the dynamic nature of a rainy scene.
Essential Materials for Painting Rain with Acrylics
To effectively paint rain with acrylics, you’ll need the following materials:
- Acrylic Paints: A range of colors, including titanium white, ivory black, ultramarine blue, cerulean blue, burnt umber, and yellow ochre. Consider adding a transparent glazing medium to enhance the translucency of your colors.
- Canvas or Painting Surface: Choose a canvas or board that is appropriate for acrylic paints. Priming the surface with gesso is recommended.
- Brushes: A variety of brushes, including round brushes for detail work, flat brushes for broad strokes, and a fan brush for creating rain effects.
- Palette: A palette for mixing your paints. A wet palette can help keep your acrylics from drying out too quickly.
- Water Container: For cleaning your brushes.
- Palette Knife: For mixing paints and creating texture.
- Spray Bottle: Filled with water for reactivating dried paint and creating atmospheric effects.
- Rags or Paper Towels: For wiping your brushes and cleaning up spills.
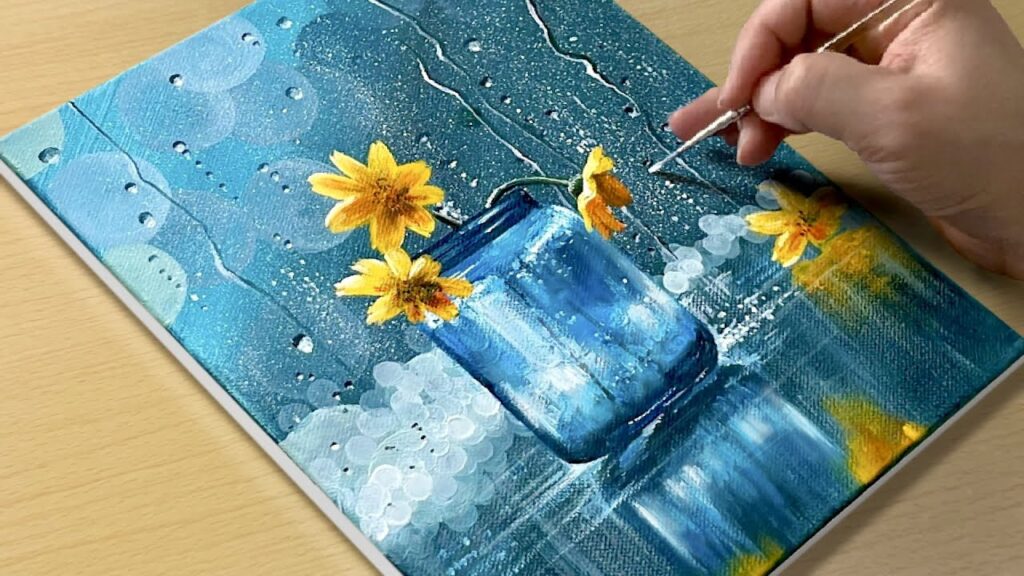
Techniques for Painting Realistic Rain
Several techniques can be employed to create realistic rain effects when painting rain with acrylics:
Creating the Illusion of Falling Rain
One of the most important aspects of painting rain with acrylics is to create the illusion of falling rain. Here are a few methods:
- Dry Brushing: Use a dry brush loaded with a small amount of light-colored paint to create thin, broken lines that suggest falling rain.
- Fan Brush Technique: Load a fan brush with diluted white or gray paint and gently flick the brush across the canvas to create a spray of rain.
- Splattering: Use a toothbrush or stiff brush to splatter diluted paint onto the canvas for a more textured rain effect. Protect areas you don’t want to be splattered with masking tape or paper.
- Lifting Technique: Apply a thin layer of wet paint and then use a clean, dry brush or paper towel to lift away some of the paint, creating streaks that resemble rain.
Depicting Reflections on Wet Surfaces
Reflections are a key element of rainy scenes. When painting rain with acrylics, pay close attention to how light reflects off wet surfaces.
- Exaggerate Highlights: Reflections are often brighter and more intense than the original objects.
- Distort Shapes: Reflections are typically distorted and elongated, especially on uneven surfaces.
- Use Complementary Colors: Use complementary colors to create contrast and enhance the vibrancy of reflections.
- Layering: Build up reflections in layers, starting with a thin wash of color and gradually adding details and highlights.
Creating Atmospheric Perspective
Atmospheric perspective is crucial for conveying depth in your painting rain with acrylics. As objects recede into the distance, they appear less distinct and their colors become muted.
- Reduce Color Intensity: Use lighter and less saturated colors for distant objects.
- Blur Edges: Soften the edges of distant objects to create a sense of atmospheric haze.
- Use Cool Colors: Cool colors, such as blues and purples, tend to recede, making them ideal for depicting distant objects.
Color Palette for Rainy Day Paintings
The color palette for painting rain with acrylics often leans towards muted and cool tones. However, pops of color can add interest and vibrancy to your paintings.
- Grays: A range of grays, from light to dark, is essential for depicting the overcast sky and wet surfaces.
- Blues: Ultramarine blue and cerulean blue are excellent choices for capturing the cool tones of a rainy day.
- Greens: Use muted greens to depict foliage and other natural elements.
- Browns: Burnt umber and raw sienna can be used to create earthy tones for buildings and other structures.
- Whites: Titanium white is crucial for mixing highlights and creating the illusion of falling rain.
- Accents: Consider adding pops of color, such as red, yellow, or orange, to create visual interest and contrast.
Step-by-Step Example: Painting a Rainy Street Scene
Let’s walk through a step-by-step example of painting rain with acrylics, focusing on a rainy street scene.
Step 1: Sketching the Composition
Begin by sketching the basic composition of your painting. Include key elements such as buildings, streets, and figures. Keep the sketch loose and simple.
Step 2: Underpainting
Apply a thin underpainting using diluted acrylics. Use a warm color, such as burnt umber, to create a base layer. This will help to create depth and dimension in your painting. [See also: Acrylic Underpainting Techniques]
Step 3: Blocking in the Colors
Start blocking in the main colors of your painting. Focus on the overall color scheme and don’t worry about details at this stage. Use a limited palette of grays, blues, and greens to create a sense of atmosphere.
Step 4: Adding Details and Reflections
Begin adding details and reflections to your painting. Pay close attention to the way light reflects off wet surfaces. Exaggerate highlights and distort shapes to create a realistic effect. Use a small brush to add details to buildings and figures.
Step 5: Painting the Rain
Now it’s time to paint the rain. Use a combination of dry brushing, fan brush techniques, and splattering to create the illusion of falling rain. Vary the intensity of the rain in different areas of the painting to create depth and interest.
Step 6: Final Touches
Add any final touches to your painting. Refine the details, adjust the colors, and add any final highlights or shadows. Step back and evaluate your painting from a distance to ensure that it is balanced and visually appealing. Allow the paint to fully dry.
Tips for Success When Painting Rain with Acrylics
Here are some additional tips to help you succeed when painting rain with acrylics:
- Use Reference Photos: Reference photos can be invaluable for capturing the details of a rainy scene.
- Experiment with Techniques: Don’t be afraid to experiment with different techniques to find what works best for you.
- Practice Regularly: The more you practice, the better you will become at painting rain with acrylics.
- Embrace Imperfection: Rain is a dynamic and unpredictable phenomenon. Don’t strive for perfection; embrace the imperfections and allow them to add character to your paintings.
- Consider the Mood: Think about the mood you want to convey in your painting. Rainy days can be melancholic, peaceful, or even dramatic. Use your color palette and brushstrokes to create the desired atmosphere.
- Protect Your Work: Once your painting is dry, apply a coat of varnish to protect it from dust and UV damage.
Conclusion
Painting rain with acrylics can be a rewarding and challenging endeavor. By understanding the key elements of a rainy scene, mastering essential techniques, and practicing regularly, you can create stunning paintings that capture the beauty and atmosphere of a rainy day. Embrace the process, experiment with different approaches, and allow your creativity to flow. With dedication and practice, you’ll be able to master the art of painting rain with acrylics and create captivating works of art. The next time the skies open up, grab your brushes and paints and let the rain inspire your next masterpiece.

