Learn to Do Your Own Acrylic Nails: A Comprehensive Guide
Acrylic nails have long been a staple in the beauty world, offering a durable and customizable alternative to natural nails. While professional salon visits can be costly and time-consuming, learn to do your own acrylic nails at home can be a rewarding and cost-effective experience. This comprehensive guide will walk you through each step, from gathering the necessary supplies to mastering the application process, ensuring you achieve salon-worthy results in the comfort of your own home. If you’re ready to learn to do your own acrylic nails, let’s dive in!
Why Learn to Do Your Own Acrylic Nails?
There are several compelling reasons to learn to do your own acrylic nails:
- Cost Savings: Salon visits can quickly add up. Doing it yourself significantly reduces expenses.
- Convenience: No need to schedule appointments or travel to a salon. You can do your nails whenever you have the time.
- Customization: You have complete control over the length, shape, and design of your nails.
- Skill Development: It’s a fun and creative skill to acquire, allowing you to express your personal style.
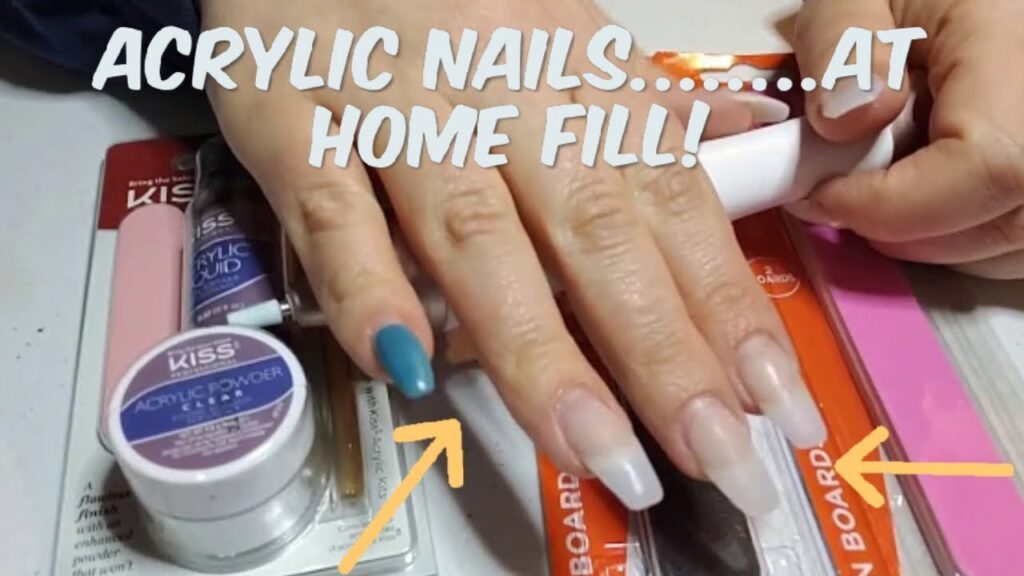
Essential Supplies for Acrylic Nail Application
Before you begin, gather all the necessary supplies. Having everything on hand will streamline the process and prevent interruptions.
- Acrylic Powder: Choose a high-quality acrylic powder in your desired color or clear for adding gel polish later.
- Acrylic Liquid (Monomer): This is the activating liquid that, when combined with acrylic powder, creates the acrylic nail.
- Acrylic Nail Brush: A good quality brush is crucial for proper application. Look for one with natural bristles that taper to a fine point.
- Nail Tips: These provide the length and shape for your acrylic nails. Choose a size and shape that suits your preferences.
- Nail Glue: To adhere the nail tips securely to your natural nails.
- Nail File and Buffer: For shaping and smoothing the acrylic nails.
- Nail Primer: This helps the acrylic adhere better to the natural nail and prevents lifting.
- Cuticle Pusher: To gently push back and remove excess cuticle from the nail plate.
- Cuticle Oil: To moisturize and nourish the cuticles after application.
- Dappen Dish: A small dish to hold the acrylic liquid.
- Dust Brush: To remove dust and debris during the filing process.
- Sanitizer: To keep everything clean and prevent infection.
- Acetone: For cleaning the brush and removing any mistakes.
Step-by-Step Guide to Applying Acrylic Nails
Now that you have your supplies, let’s walk through the application process step-by-step.
Preparation is Key
Proper preparation is essential for a long-lasting and beautiful acrylic nail application.
- Clean Your Hands: Wash your hands thoroughly with soap and water.
- Push Back Cuticles: Gently push back your cuticles with a cuticle pusher.
- Buff Natural Nails: Lightly buff the surface of your natural nails to remove shine. This creates a rough surface for the acrylic to adhere to.
- Dehydrate Nails: Use a nail dehydrator to remove any oils or moisture from the nail plate.
Applying the Nail Tips
Applying the nail tips correctly is crucial for the overall look and strength of your acrylic nails.
- Choose the Right Size: Select nail tips that fit your natural nails comfortably. They should cover the entire width of your nail.
- Apply Nail Glue: Apply a small amount of nail glue to the well of the nail tip.
- Attach the Tip: Press the tip onto your natural nail at a 45-degree angle, starting at the free edge. Hold it in place for a few seconds until the glue dries.
- Trim and Shape: Use nail clippers to trim the nail tips to your desired length. Then, use a nail file to shape the tips to your preferred shape (e.g., square, oval, almond).
- Blend the Tip: Use a nail file to blend the edge of the nail tip with your natural nail. This creates a seamless transition.
Applying the Acrylic
This is where the real skill comes in. Practice makes perfect when it comes to applying acrylic.
- Prepare Your Brush: Dip your acrylic brush into the monomer, then wipe off any excess liquid on the side of the dappen dish.
- Pick Up Acrylic: Dip the tip of your brush into the acrylic powder, creating a small bead. The bead should be moist but not runny.
- Apply the First Bead: Place the first bead of acrylic near the cuticle area, but don’t touch the skin. Gently pat and smooth the acrylic towards the free edge.
- Apply the Second Bead: Pick up another bead of acrylic and place it in the middle of the nail. Blend it with the first bead.
- Apply the Third Bead: Place the third bead of acrylic near the free edge. Blend it with the other beads to create a smooth, even surface.
- Shape and Smooth: Use your brush to shape and smooth the acrylic as it dries. Work quickly, as acrylic hardens rapidly.
Filing and Finishing
Filing and finishing are essential for achieving a professional-looking result.
- File the Acrylic: Use a nail file to refine the shape of the acrylic nails. Pay attention to the sidewalls and the free edge.
- Buff the Surface: Use a nail buffer to smooth the surface of the acrylic nails. This will remove any imperfections and create a smooth base for polish.
- Clean the Nails: Use a dust brush to remove any dust and debris from the filing process.
- Apply Primer: Apply a thin coat of nail primer to the acrylic nails. This will help the polish adhere better.
Adding Polish and Top Coat
Now you can add your favorite polish and top coat to complete your acrylic nails.
- Apply Polish: Apply two coats of your favorite nail polish, allowing each coat to dry completely.
- Apply Top Coat: Apply a top coat to protect the polish and add shine.
- Clean Up: Use a cotton swab dipped in acetone to clean up any polish that got on your skin.
- Apply Cuticle Oil: Apply cuticle oil to moisturize your cuticles.
Tips for Success
Learn to do your own acrylic nails requires practice and patience. Here are some tips to help you succeed:
- Practice Makes Perfect: Don’t get discouraged if your first attempt isn’t perfect. Keep practicing, and you’ll improve over time.
- Work in a Well-Ventilated Area: Acrylic fumes can be strong, so work in a well-ventilated area to avoid inhaling too much.
- Clean Your Brush Regularly: Clean your acrylic brush with acetone after each use to prevent it from hardening.
- Don’t Overwork the Acrylic: Overworking the acrylic can cause it to become brittle and prone to lifting.
- Use High-Quality Products: Investing in high-quality acrylic powder, liquid, and brushes will make a big difference in the final result.
- Watch Tutorials: There are many helpful tutorials online that can guide you through the process.
Troubleshooting Common Issues
Even with careful application, you may encounter some common issues. Here’s how to troubleshoot them:
- Lifting: Lifting occurs when the acrylic separates from the natural nail. To prevent lifting, make sure to properly prepare your nails and use a good quality primer.
- Bubbles: Bubbles in the acrylic can be caused by using too much liquid or not mixing the acrylic properly. Make sure to use the correct ratio of liquid to powder and blend the acrylic thoroughly.
- Yellowing: Yellowing can occur if the acrylic is exposed to sunlight or certain chemicals. Use a UV-protective top coat to prevent yellowing.
- Cracking: Cracking can be caused by applying the acrylic too thinly or using low-quality products. Make sure to apply the acrylic in even layers and use high-quality materials.
Maintaining Your Acrylic Nails
Proper maintenance is essential for keeping your acrylic nails looking their best.
- Fill-Ins: Get fill-ins every 2-3 weeks to fill in the gap between the acrylic and your natural nail as it grows out.
- Moisturize: Apply cuticle oil daily to keep your cuticles and nails moisturized.
- Protect Your Nails: Wear gloves when doing housework or gardening to protect your acrylic nails from damage.
- Avoid Harsh Chemicals: Avoid exposing your acrylic nails to harsh chemicals, such as acetone or bleach.
Removing Acrylic Nails Safely
It’s important to remove acrylic nails safely to avoid damaging your natural nails.
- File Off the Top Coat: Use a nail file to file off the top coat of the acrylic nails.
- Soak in Acetone: Soak your nails in acetone for 20-30 minutes, or until the acrylic becomes soft and pliable.
- Gently Remove the Acrylic: Use a cuticle pusher to gently remove the softened acrylic.
- Moisturize: Apply cuticle oil to moisturize your cuticles and nails.
Learn to do your own acrylic nails is a skill that can save you money and allow you to express your creativity. By following this comprehensive guide and practicing regularly, you can achieve salon-worthy results at home. Remember to be patient, use high-quality products, and take care of your nails to keep them looking their best. Once you learn to do your own acrylic nails, you’ll wonder why you didn’t start sooner! Don’t be afraid to experiment with different colors, shapes, and designs to create unique and personalized looks. With a little practice, you can become a pro at doing your own acrylic nails. So grab your supplies, get ready to learn, and enjoy the process!
Learn to do your own acrylic nails and unlock a whole new world of nail design possibilities. Whether you prefer classic French tips, bold colors, or intricate nail art, the possibilities are endless. Embrace the challenge, enjoy the process, and show off your beautiful, homemade acrylic nails!
[See also: Different Acrylic Nail Shapes]
[See also: How to Care for Your Acrylic Nails]
[See also: The Best Acrylic Nail Kits for Beginners]

