Creating the Perfect Henna Recipe for Tattoos: A Comprehensive Guide
Henna tattoos, also known as mehndi, have been a cherished tradition for centuries, adorning skin with intricate designs that symbolize celebrations, milestones, and cultural heritage. If you’re looking to create your own temporary body art, understanding the fundamentals of a proper henna recipe for tattoos is crucial. This guide provides a comprehensive overview of crafting a safe and effective henna paste for stunning and long-lasting temporary tattoos.
Understanding Henna: Natural vs. Black Henna
Before diving into the henna recipe for tattoos, it’s essential to differentiate between natural henna and so-called “black henna.” Natural henna, derived from the *Lawsonia inermis* plant, produces a stain that ranges from orange to reddish-brown. Black henna, on the other hand, often contains a chemical dye called paraphenylenediamine (PPD), which can cause severe allergic reactions, permanent scarring, and long-term health problems. Always ensure you are using 100% natural henna powder for your safety.
Essential Ingredients for a Safe Henna Recipe
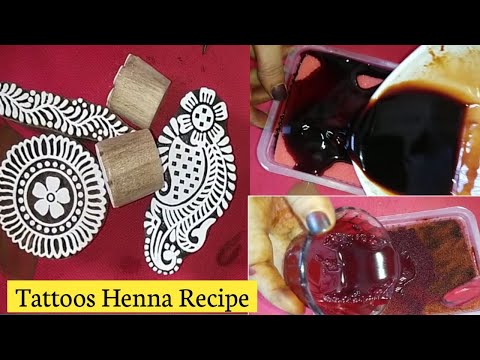
A basic henna recipe for tattoos typically consists of the following ingredients:
- Henna Powder: The core ingredient. Choose a high-quality, finely sifted henna powder specifically intended for body art. Look for terms like “BAQ” (Body Art Quality) to ensure purity and fineness.
- Liquid: Traditionally, lemon juice is used. The acidity helps to release the dye from the henna powder. Other options include strong black tea or a mixture of lemon juice and tea.
- Essential Oils: Certain essential oils, such as lavender, cajeput, or tea tree, contain monoterpenes that enhance the henna stain. These oils help to break down the cellulose in the henna leaves, releasing more dye.
- Sugar: Adding a small amount of sugar (like dextrose) helps to create a smoother paste that is easier to apply and sticks better to the skin.
Step-by-Step Guide to Making Henna Paste
Here’s a detailed guide to creating your own henna recipe for tattoos:
Step 1: Gather Your Supplies
Ensure you have all the necessary ingredients and tools: henna powder, lemon juice (or your chosen liquid), essential oil, sugar, a glass or stainless steel bowl, a spoon or whisk, plastic wrap, and a cone or applicator bottle.
Step 2: Mixing the Henna Paste
- In the bowl, combine the henna powder and sugar. The amount of henna powder will depend on how much paste you want to make. A good starting point is ¼ cup of henna powder. Use approximately 1 teaspoon of sugar.
- Gradually add the lemon juice (or liquid of your choice) while mixing continuously. Add the liquid slowly to avoid creating a lumpy paste. Aim for a consistency similar to yogurt or thick mashed potatoes.
- Add the essential oil. A general guideline is to use 1-2 teaspoons of essential oil for every ¼ cup of henna powder. Stir well to incorporate the oil evenly.
Step 3: Dye Release
This is a crucial step in the henna recipe for tattoos. Cover the bowl tightly with plastic wrap, pressing it directly onto the surface of the paste to prevent air exposure. Allow the paste to sit at room temperature for dye release. The time required varies depending on the henna powder and the temperature, but it usually takes between 4 to 24 hours. You’ll know the dye is released when a small amount of paste smeared on your palm leaves an orange stain within a few minutes.
Step 4: Straining the Paste (Optional)
If you prefer a very smooth paste, you can strain it through a fine-mesh sieve or nylon stocking to remove any lumps or unmixed powder particles. This step is particularly useful if you are using a cone with a very fine tip.
Step 5: Filling the Applicator
Once the dye is released and the paste is smooth, transfer it to your cone or applicator bottle. There are various methods for filling cones; find one that works best for you. Ensure the cone is sealed tightly to prevent the paste from drying out.
Tips for Achieving a Darker Henna Stain
Several factors can influence the darkness of your henna stain. Here are some tips to maximize your results:
- Use High-Quality Henna Powder: As mentioned earlier, BAQ henna powder is essential.
- Proper Dye Release: Allowing sufficient time for dye release is critical.
- Essential Oils: Using the right essential oils in your henna recipe for tattoos will boost the stain.
- Skin Preparation: Exfoliate your skin before applying henna to remove dead skin cells. Avoid applying lotions or oils to the area.
- Keep the Paste Moist: Once the henna is applied, keep it moist by applying a mixture of lemon juice and sugar or using a henna sealant.
- Warmth: Keep the hennaed area warm. Body heat helps to deepen the stain.
- Aftercare: After removing the henna paste (do not wash it off, rather scrape it off), avoid washing the area with soap for at least 12 hours. Apply a natural oil like coconut or olive oil to moisturize the skin.
Troubleshooting Common Henna Problems
Even with the best henna recipe for tattoos, you might encounter some challenges. Here are some common issues and their solutions:
- Pale Stain: This could be due to poor quality henna powder, insufficient dye release, or inadequate aftercare.
- Runny Paste: You might have added too much liquid. Add more henna powder to thicken the paste.
- Clogged Cone Tip: Strain the paste to remove any lumps. Use a fine needle to unclog the tip.
- Allergic Reaction: If you experience itching, redness, or swelling, discontinue use immediately and consult a doctor. This is especially important to monitor if you think you may have used black henna.
The Cultural Significance of Henna
Beyond aesthetics, henna holds deep cultural significance in many parts of the world, particularly in South Asia, the Middle East, and Africa. It is often used in wedding ceremonies, festivals, and other important celebrations. The intricate designs are believed to bring good luck, prosperity, and protection. When creating your own henna recipe for tattoos, it’s important to be mindful of these cultural traditions and use henna respectfully.
Henna Safety and Precautions
While natural henna is generally safe, it’s crucial to take certain precautions:
- Patch Test: Before applying henna extensively, perform a patch test on a small area of your skin to check for any allergic reactions.
- Avoid Black Henna: Always verify that the henna you are using is 100% natural and does not contain PPD.
- Consult a Professional: If you are unsure about making your own henna paste, consider seeking the services of a professional henna artist.
- Storage: Store leftover henna paste in the freezer to prevent it from spoiling. Thaw it before use.
Alternative Henna Recipes and Variations
While the basic henna recipe for tattoos remains consistent, there are variations you can explore:
- Tea-Based Henna: Using strong black tea instead of lemon juice can result in a slightly darker stain.
- Coffee-Based Henna: Coffee can add a reddish-brown hue to the henna stain.
- Eucalyptus Oil: Some artists prefer eucalyptus oil for its strong scent and ability to enhance the stain.
Conclusion: Mastering the Art of Henna
Crafting the perfect henna recipe for tattoos is a blend of science and art. By understanding the ingredients, following the steps carefully, and practicing good aftercare, you can create stunning temporary body art that celebrates tradition and personal expression. Remember to always prioritize safety by using natural henna and taking necessary precautions. With patience and practice, you’ll be able to master the art of henna and create beautiful designs that last.
Whether you are a beginner or an experienced henna artist, this guide provides valuable insights into creating a safe and effective henna recipe for tattoos. Enjoy the journey of exploring this ancient art form and expressing your creativity through beautiful henna designs. Experiment with different variations and techniques to find what works best for you, but always prioritize safety and respect for the cultural significance of henna.
[See also: Henna Tattoo Aftercare Tips] [See also: The History of Henna]

