Capturing Likeness: A Comprehensive Guide to Acrylic Paint Portrait Techniques
Acrylic paints have become a favorite medium for portrait artists of all skill levels. Their versatility, quick-drying nature, and vibrant colors make them ideal for capturing the nuances of the human face. Whether you’re a seasoned painter or just starting your artistic journey, mastering acrylic paint portrait techniques can unlock a new level of creative expression. This guide will delve into the essential aspects of creating stunning acrylic paint portraits, from selecting the right materials to understanding color mixing and achieving realistic skin tones.
Why Choose Acrylics for Portrait Painting?
Before diving into the techniques, let’s understand why acrylic paint is so popular for portraiture. Unlike oils, which require solvents and long drying times, acrylics are water-based, easy to clean, and dry relatively quickly. This allows for layering and faster progress, which is particularly beneficial for beginners. Acrylic paints also offer excellent color saturation and can be used on a variety of surfaces, including canvas, wood, and paper. Moreover, they are more affordable than oils, making them a budget-friendly option for aspiring artists.
Essential Materials for Painting Acrylic Portraits
To embark on your acrylic paint portrait journey, you’ll need the following materials:
- Acrylic Paints: Choose a range of colors, including primary colors (red, yellow, blue), secondary colors (green, orange, purple), and earth tones (burnt umber, raw sienna, ochre). Titanium white and ivory black are also essential. Consider purchasing a student-grade set to start, and upgrade to artist-grade paints as your skills improve.
- Brushes: A variety of brush shapes and sizes is crucial. Round brushes are ideal for fine details, while flat brushes are suitable for broad strokes and blending. Filbert brushes offer a good balance for both. Synthetic brushes are a good choice for acrylics as they are durable and easy to clean.
- Canvas or Painting Panel: Stretched canvas is a classic choice, but painting panels offer a smoother surface. Choose a size that suits your project. Priming the surface with gesso is recommended for better paint adhesion.
- Palette: A palette is necessary to mix your paints. A disposable palette pad or a wet palette (which keeps the paints moist) are excellent options.
- Water Container: For cleaning your brushes.
- Palette Knife: Useful for mixing paints and applying thick layers of texture.
- Easel: An easel provides a stable and comfortable working surface.
- Reference Photo: A clear, high-resolution photo of your subject is essential for creating a realistic portrait.
- Pencils and Eraser: For sketching the initial outline.
Step-by-Step Guide to Painting an Acrylic Portrait
Step 1: Prepare Your Canvas and Sketch the Outline
Begin by priming your canvas with gesso. This creates a smooth, even surface for the paint to adhere to. Once the gesso is dry, lightly sketch the outline of your subject onto the canvas using a pencil. Pay close attention to proportions and key features. Use light, erasable lines, as these will be covered by paint later. Focus on capturing the overall shape of the head, the placement of the eyes, nose, and mouth, and the basic contours of the face.
Step 2: Underpainting
The underpainting is a foundational layer that establishes the values (lights and darks) of the portrait. Use a diluted wash of a neutral color, such as burnt umber or raw sienna, to block in the shadows and highlights. This layer helps to create depth and dimension. Don’t focus on details at this stage; concentrate on the overall tonal structure. [See also: Understanding Value in Painting]
Step 3: Blocking in the Colors
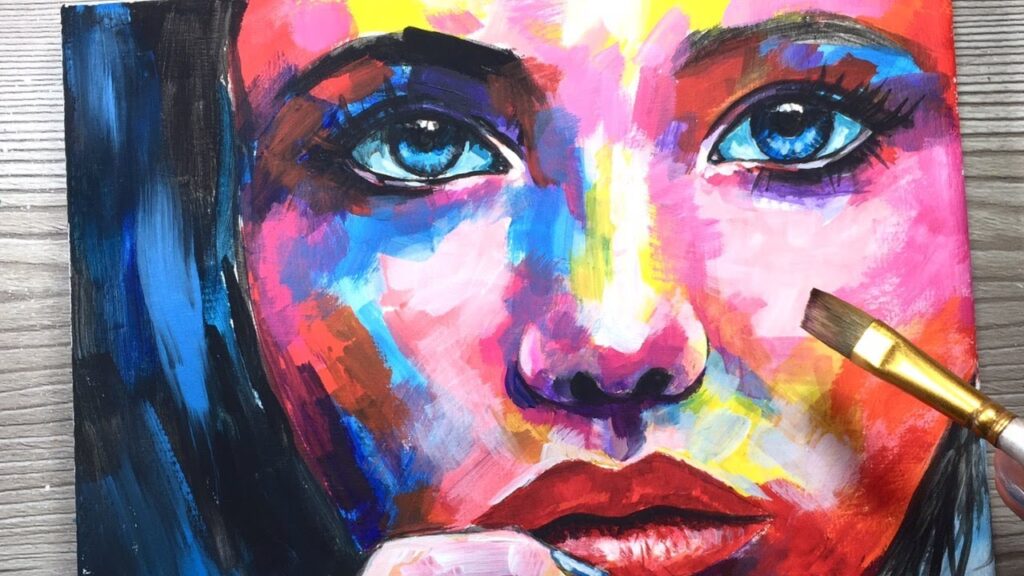
Now it’s time to start applying color. Begin by mixing your basic skin tones. Remember that skin tones are rarely a single color; they are a complex blend of reds, yellows, blues, and browns. Use your reference photo as a guide to match the colors as closely as possible. Apply the colors in broad strokes, focusing on the major areas of light and shadow. Avoid blending too much at this stage; the goal is to establish the overall color palette.
Step 4: Layering and Blending
Once you have blocked in the colors, you can begin layering and blending to create smoother transitions and more realistic skin tones. Use thin layers of paint and blend them carefully with a soft brush. Pay attention to the subtle variations in color and value. Use highlights to bring out the form and shadows to create depth. This is where the acrylic paint portrait really starts to come to life. Remember that acrylic paint dries quickly, so work in small sections and blend as you go.
Step 5: Adding Details
Now it’s time to add the details that will bring your portrait to life. Focus on the eyes, nose, and mouth, as these are the most expressive features of the face. Use a fine-tipped brush to create sharp lines and subtle highlights. Pay attention to the details of the hair, clothing, and background. Adding small details can make a big difference in the overall realism and impact of the portrait. Don’t rush this stage; take your time and be patient. A well-executed acrylic paint portrait requires attention to detail.
Step 6: Refining and Finishing Touches
Step back and assess your acrylic paint portrait from a distance. Look for areas that need improvement and make any necessary adjustments. Add final highlights and shadows to enhance the form. Check the overall balance and composition of the portrait. Once you are satisfied, allow the painting to dry completely. You can then apply a varnish to protect the paint and enhance the colors. This will also give the acrylic paint portrait a more professional finish.
Tips for Achieving Realistic Skin Tones with Acrylics
One of the biggest challenges in acrylic paint portrait painting is achieving realistic skin tones. Here are some tips to help you:
- Start with a Color Palette: Before you start painting, create a color palette of skin tones. Mix different combinations of reds, yellows, blues, and browns and test them on a piece of paper. This will help you to visualize the range of colors you’ll need.
- Use a Limited Palette: A limited palette of colors can actually help you to achieve more harmonious skin tones. Try using just three or four colors, such as cadmium red, cadmium yellow, ultramarine blue, and burnt umber.
- Mix Your Colors Thoroughly: Incompletely mixed colors can create a muddy or uneven effect. Make sure to mix your colors thoroughly before applying them to the canvas.
- Use Thin Layers: Applying thin layers of paint allows you to build up the colors gradually and create smoother transitions.
- Pay Attention to the Light: The way light falls on the face can dramatically affect the appearance of skin tones. Pay attention to the highlights and shadows and use them to create depth and dimension.
- Experiment with Glazing: Glazing is a technique where you apply a thin, transparent layer of paint over a dried layer. This can be used to subtly adjust the colors and values of the skin tones.
Common Mistakes to Avoid When Painting Acrylic Portraits
Even experienced artists make mistakes. Here are some common pitfalls to avoid when creating an acrylic paint portrait:
- Poor Proportions: Incorrect proportions can make the portrait look unrealistic. Take your time to accurately measure and sketch the initial outline.
- Flatness: Lack of depth and dimension can make the portrait look flat and lifeless. Use shadows and highlights to create form.
- Over-Blending: Over-blending can result in a muddy or indistinct effect. Avoid blending too much, especially in the early stages.
- Incorrect Color Mixing: Incorrect color mixing can result in unnatural skin tones. Take the time to carefully mix your colors and test them before applying them to the canvas.
- Ignoring the Background: The background is an important part of the portrait. Don’t neglect it. Choose a background that complements the subject and enhances the overall composition.
Advanced Techniques for Acrylic Portrait Painting
Once you have mastered the basic techniques, you can explore more advanced approaches to acrylic paint portrait painting:
- Alla Prima: Alla prima is a technique where the painting is completed in one sitting, without layering. This requires a high degree of skill and confidence.
- Grisaille: Grisaille is a technique where the painting is started in monochrome (usually gray) and then color is added in subsequent layers. This can be a good way to establish the values before adding color.
- Mixed Media: Experiment with incorporating other media into your acrylic paint portrait, such as charcoal, pastel, or collage.
- Impasto: Impasto is a technique where the paint is applied thickly, creating texture. This can be used to add visual interest and drama to the portrait.
Conclusion: Mastering the Art of Acrylic Portrait Painting
Creating a compelling acrylic paint portrait is a rewarding journey that combines technical skill with artistic expression. By understanding the properties of acrylic paints, mastering fundamental techniques, and continuously experimenting, you can unlock your creative potential and capture the essence of your subjects. Remember to practice regularly, study the works of master portrait artists, and embrace the challenges along the way. With dedication and perseverance, you can create stunning acrylic paint portraits that will be cherished for years to come. The key is to never stop learning and to always strive to improve your skills. So grab your brushes, choose your subject, and start painting your own masterpiece!
Whether you aim for photorealism or a more expressive style, acrylic paint portraits offer a versatile medium for translating your vision onto canvas. The quick-drying nature of acrylics allows for efficient layering and experimentation, making it an ideal choice for both beginners and experienced artists. The ability to manipulate the paint to achieve different textures and effects further enhances the creative possibilities. From capturing the subtle nuances of skin tone to portraying the unique character of your subject, acrylic paint provides the tools to create captivating and enduring works of art.

