Acrylic Dip Refill: Everything You Need to Know for a Flawless Finish
Acrylic dip nails have surged in popularity, offering a durable and beautiful alternative to traditional manicures. However, like all manicures, they require maintenance. Understanding the process of an acrylic dip refill is crucial for extending the life of your manicure and maintaining a flawless look. This comprehensive guide covers everything from identifying when you need a refill to the step-by-step process and aftercare tips.
Why Refills Are Necessary
As your natural nails grow, a gap appears between the cuticle and the acrylic dip. This gap not only looks unsightly but also creates a potential entry point for moisture and bacteria, which can lead to lifting and even nail infections. An acrylic dip refill addresses these issues by filling in the gap, rebalancing the nail structure, and preventing damage to your natural nails. Regular refills are essential for maintaining the integrity and appearance of your acrylic dip manicure.
When Do You Need an Acrylic Dip Refill?
The timing for an acrylic dip refill varies depending on your nail growth rate. Generally, you should consider a refill every 2-3 weeks. Key indicators that you need a refill include:
- A noticeable gap between the cuticle and the acrylic dip.
- Lifting or chipping of the acrylic dip near the cuticle.
- An uneven or unbalanced nail structure.
Ignoring these signs can lead to more significant problems, such as complete nail separation or fungal infections. Proactive maintenance is always the best approach.
Tools and Materials Required for an Acrylic Dip Refill
Before you begin the acrylic dip refill process, gather all the necessary tools and materials. This will ensure a smooth and efficient experience:
- Electric Nail File (E-file): For removing the top layer of acrylic dip and shaping the nail.
- Nail File and Buffer: For refining the shape and smoothing the surface.
- Cuticle Pusher: To gently push back the cuticles.
- Cuticle Nipper: To trim any excess cuticle skin.
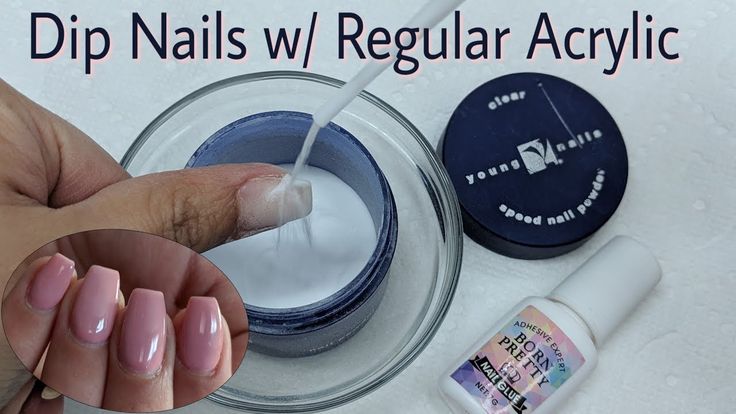
- Acrylic Dip Powder: In your desired color.
- Acrylic Dip Liquid System: Including base coat, activator, and top coat.
- Brush Cleaner: To keep your brushes clean and prevent contamination.
- Lint-Free Wipes: For cleaning the nail surface.
- Dust Brush: To remove dust particles during filing.
- Nail Dehydrator: To remove oils and moisture from the nail surface.
- Primer: To improve adhesion of the acrylic dip.
Step-by-Step Guide to Performing an Acrylic Dip Refill
Follow these steps carefully to achieve a professional-looking acrylic dip refill:
Step 1: Preparation
Begin by washing your hands thoroughly and sanitizing your tools. Prepare your workspace by laying down a clean towel or mat. This helps keep your area tidy and hygienic.
Step 2: Remove the Top Coat
Use an E-file with a fine grit to gently remove the top coat layer of the existing acrylic dip. Be careful not to apply too much pressure, as this can damage the natural nail. The goal is to create a smooth surface for the new acrylic dip to adhere to.
Step 3: File Down the Existing Acrylic Dip
With the E-file, carefully file down the acrylic dip around the cuticle area, blending it seamlessly with the natural nail growth. Reduce the bulk of the acrylic dip, but avoid filing down to the natural nail. This step is crucial for creating a smooth transition and preventing a bulky appearance. [See also: Removing Acrylic Dip Nails at Home]
Step 4: Push Back and Trim Cuticles
Use a cuticle pusher to gently push back the cuticles. If necessary, trim any excess cuticle skin with a cuticle nipper. Be careful not to cut too deeply, as this can lead to injury or infection. Healthy cuticles are essential for a long-lasting manicure.
Step 5: Buff the Nail Surface
Use a nail buffer to smooth the surface of the existing acrylic dip and the exposed natural nail. This creates a uniform texture and improves adhesion. Remove any dust particles with a dust brush.
Step 6: Dehydrate and Prime the Nails
Apply a nail dehydrator to remove any oils and moisture from the nail surface. Follow with a primer to improve the adhesion of the new acrylic dip. This step is crucial for preventing lifting and ensuring a long-lasting refill.
Step 7: Apply the Acrylic Dip
Apply a thin layer of base coat to the exposed natural nail area. Immediately dip the nail into the acrylic dip powder at a 45-degree angle. Tap off any excess powder. Repeat this process 1-2 times to achieve the desired thickness and coverage. Ensure that the new acrylic dip blends seamlessly with the existing manicure.
Step 8: Activate the Acrylic Dip
Apply the activator liquid to the entire nail surface. Wait for 1-2 minutes for the activator to fully dry and harden the acrylic dip. This step is essential for setting the acrylic dip and creating a durable finish.
Step 9: File and Shape the Nails
Use a nail file to shape the nails to your desired length and shape. Refine the edges and ensure that the acrylic dip is evenly distributed. Remove any imperfections and create a smooth, uniform surface.
Step 10: Apply the Top Coat
Apply two coats of top coat to the entire nail surface, allowing each coat to dry completely before applying the next. The top coat provides a glossy finish and protects the acrylic dip from chipping and damage. Ensure that the top coat is applied evenly for a professional-looking result.
Aftercare Tips for Your Acrylic Dip Refill
Proper aftercare is essential for maintaining the longevity and appearance of your acrylic dip refill. Follow these tips to keep your nails looking their best:
- Moisturize Regularly: Apply cuticle oil and hand cream daily to keep your nails and skin hydrated. This helps prevent dryness and cracking.
- Avoid Harsh Chemicals: Wear gloves when handling harsh chemicals or cleaning products to protect your acrylic dip from damage.
- Don’t Use Your Nails as Tools: Avoid using your nails to open packages or scrape surfaces, as this can cause chipping and breakage.
- Schedule Regular Refills: Stick to a regular refill schedule to maintain the integrity of your manicure and prevent damage to your natural nails.
Troubleshooting Common Issues
Even with careful application, you may encounter some common issues during the acrylic dip refill process. Here are some solutions:
- Lifting: Ensure that you are properly dehydrating and priming the nails before applying the acrylic dip. Avoid getting product on the cuticles.
- Chipping: Apply a generous layer of top coat and reapply every few days to protect the acrylic dip from chipping.
- Uneven Application: Practice your dipping technique and ensure that you are applying the acrylic dip evenly across the nail surface.
- Bubbling: Avoid shaking the acrylic dip powder before use, as this can create air bubbles.
Cost Considerations
The cost of an acrylic dip refill can vary depending on the salon and the complexity of the design. On average, you can expect to pay between $25 and $40 for a refill. Doing it yourself can save money in the long run, but it requires an initial investment in tools and materials. [See also: The Ultimate Guide to Dip Powder Nails]
The Benefits of Regular Acrylic Dip Refills
Investing in regular acrylic dip refills offers numerous benefits, including:
- Extended Manicure Life: Refills prolong the life of your acrylic dip manicure, saving you time and money.
- Improved Nail Health: Refills prevent lifting and chipping, which can lead to nail damage and infections.
- Enhanced Appearance: Refills maintain a flawless and polished look, keeping your nails looking their best.
- Protection for Natural Nails: Refills provide a protective layer for your natural nails, preventing breakage and damage.
Conclusion
Mastering the art of the acrylic dip refill is essential for anyone who loves the durability and beauty of acrylic dip nails. By following this comprehensive guide, you can maintain a flawless manicure, protect your natural nails, and enjoy the long-lasting benefits of acrylic dip. Remember to prioritize proper preparation, careful application, and consistent aftercare for the best results. With practice and patience, you’ll be able to achieve professional-looking refills at home, saving time and money while keeping your nails looking fabulous. The key to a successful acrylic dip refill lies in meticulous attention to detail and a commitment to nail health. By understanding the process and investing in the right tools and materials, you can ensure that your acrylic dip manicure remains a source of pride and confidence.

