OPI Acrylic Nail Kit: A Comprehensive Guide for Professionals and Enthusiasts
The world of nail enhancements offers a myriad of options, but few hold the prestige and reliability of acrylic nails. Among the various brands offering acrylic systems, OPI stands out as a leader, known for its quality, innovation, and extensive color range. This article delves into the OPI acrylic nail kit, exploring its components, benefits, application techniques, and everything you need to know to achieve salon-quality acrylic nails at home or in a professional setting.
What is an OPI Acrylic Nail Kit?
An OPI acrylic nail kit is a comprehensive set of products designed to create durable and beautiful acrylic nail enhancements. It typically includes everything needed to sculpt, shape, and finish acrylic nails, making it a convenient option for both beginners and experienced nail technicians. The hallmark of an OPI kit is the brand’s commitment to high-quality ingredients and formulations, ensuring a strong, long-lasting, and aesthetically pleasing result.
Components of a Typical OPI Acrylic Nail Kit
While the specific contents may vary depending on the kit, a standard OPI acrylic nail kit usually contains the following:
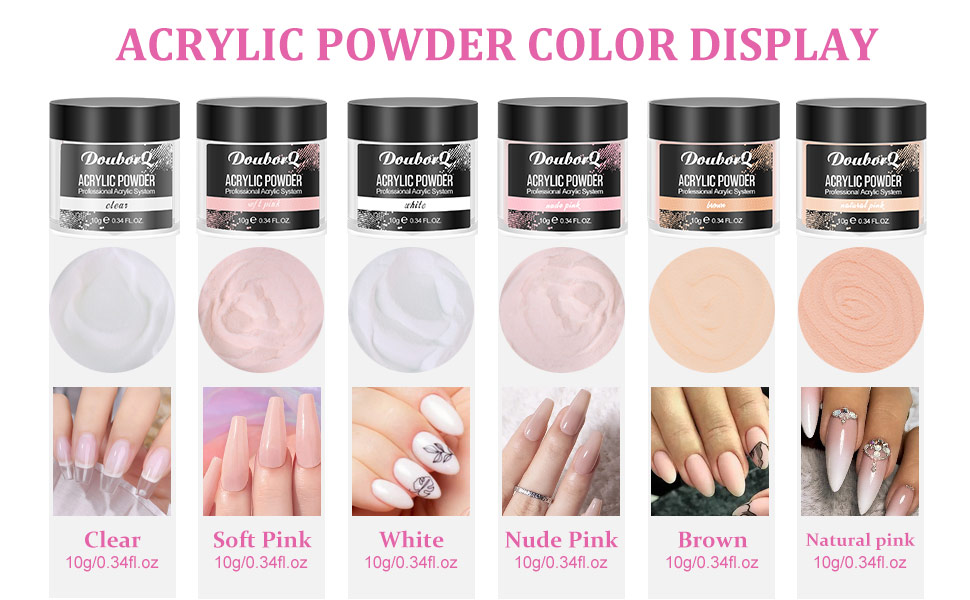
- Acrylic Powder: Available in various shades, including clear, white, pink, and cover colors. The powder is the foundation of the acrylic nail.
- Acrylic Liquid Monomer: This liquid activates the acrylic powder, creating a workable mixture that hardens into a durable nail enhancement.
- Primer: Applied to the natural nail to improve adhesion of the acrylic and prevent lifting.
- Nail Forms or Tips: Used to extend the length of the nail and create the desired shape.
- Acrylic Brush: A specialized brush designed for picking up and applying the acrylic mixture.
- Dappen Dish: A small dish used to hold the acrylic liquid monomer.
- Nail File and Buffer: For shaping and smoothing the acrylic nails.
- Cuticle Pusher: To prepare the nail bed before application.
- Top Coat: To seal and protect the acrylic nails, adding shine and durability.
Benefits of Using an OPI Acrylic Nail Kit
Choosing an OPI acrylic nail kit offers several advantages:
- High-Quality Products: OPI is renowned for its commitment to quality, ensuring that its acrylic powders and liquids provide excellent adhesion, durability, and color consistency.
- Professional Results: The formulations are designed to be easy to work with, allowing both professionals and DIY enthusiasts to achieve salon-quality results.
- Extensive Color Range: OPI offers a wide variety of acrylic powder colors, allowing for endless customization and creative nail designs.
- Long-Lasting Wear: Acrylic nails created with an OPI kit are known for their strength and longevity, resisting chipping, cracking, and lifting.
- Versatility: Acrylic nails can be customized with various shapes, lengths, and designs, offering endless possibilities for self-expression.
How to Apply Acrylic Nails with an OPI Kit: A Step-by-Step Guide
Applying acrylic nails requires patience and practice. Here’s a detailed guide to help you achieve a professional-looking manicure using an OPI acrylic nail kit:
Preparation
- Clean and Sanitize: Start by thoroughly cleaning and sanitizing your hands and nails to prevent infection.
- Push Back Cuticles: Gently push back your cuticles using a cuticle pusher. This helps to create a clean nail bed and improve adhesion.
- Buff the Nail Surface: Lightly buff the surface of your natural nails to remove shine and create a slightly rough texture for better adhesion.
- Apply Nail Forms or Tips: If you’re using nail forms, attach them securely to your natural nails. If you’re using tips, apply them with nail glue and trim them to the desired length.
Acrylic Application
- Apply Primer: Apply a thin layer of nail primer to your natural nails, avoiding the skin. Allow it to dry completely.
- Prepare the Acrylic Mixture: Pour a small amount of acrylic liquid monomer into a dappen dish. Dip your acrylic brush into the monomer, then tap off any excess liquid.
- Pick Up Acrylic Powder: Dip the wet brush into the acrylic powder, creating a small bead. The consistency should be slightly wet but not runny.
- Apply the Acrylic: Place the bead of acrylic onto your nail, near the cuticle area. Gently pat and shape the acrylic, blending it seamlessly with your natural nail.
- Repeat: Repeat steps 2-4 to create a thin, even layer of acrylic over the entire nail surface. Work quickly, as the acrylic will start to harden.
- Shape and Refine: Once the acrylic has hardened, use a nail file to shape the nails to your desired shape. Refine the surface with a buffer to smooth out any imperfections.
Finishing Touches
- Clean and Dust: Remove any dust or debris from the nails with a nail brush.
- Apply Top Coat: Apply a thin layer of top coat to seal and protect the acrylic nails, adding shine and durability.
- Cure (if necessary): Some top coats require curing under a UV or LED lamp. Follow the manufacturer’s instructions.
- Hydrate Cuticles: Apply cuticle oil to hydrate your cuticles and keep them healthy.
Choosing the Right OPI Acrylic Nail Kit
With various OPI acrylic nail kit options available, it’s essential to choose one that suits your needs and skill level. Consider the following factors:
- Skill Level: Beginner kits typically include fewer products and simpler instructions, while professional kits offer a wider range of options and more advanced techniques.
- Color Selection: Choose a kit with a color selection that matches your preferences and the types of nail designs you want to create.
- Kit Size: Consider the size of the kit based on how often you plan to use it. Larger kits are more cost-effective for frequent use.
- Included Tools: Check if the kit includes essential tools like an acrylic brush, dappen dish, and nail files.
- Price: Compare prices from different retailers to find the best value for your money.
Tips for Maintaining Your OPI Acrylic Nails
To keep your OPI acrylic nails looking their best and prevent damage, follow these maintenance tips:
- Regular Fills: Schedule regular fill appointments every 2-3 weeks to fill in the gap between the acrylic and your natural nail.
- Avoid Harsh Chemicals: Wear gloves when handling harsh chemicals to prevent discoloration and damage to the acrylic.
- Moisturize Regularly: Apply cuticle oil daily to keep your cuticles and nails hydrated.
- Be Gentle: Avoid using your nails as tools, as this can cause them to break or lift.
- Proper Removal: Never peel off acrylic nails, as this can damage your natural nails. Instead, soak them in acetone until they soften and can be gently removed.
Troubleshooting Common Acrylic Nail Problems
Even with the best products and techniques, you may encounter some common problems with acrylic nails. Here’s how to troubleshoot them:
- Lifting: Lifting occurs when the acrylic separates from the natural nail. This can be caused by improper preparation, poor adhesion, or exposure to moisture. To prevent lifting, ensure that you properly prepare the nail surface and use a high-quality primer.
- Cracking: Cracking can be caused by applying the acrylic too thinly or by exposing the nails to excessive force. To prevent cracking, apply a sufficient amount of acrylic and avoid using your nails as tools.
- Yellowing: Yellowing can occur when the acrylic is exposed to sunlight or certain chemicals. To prevent yellowing, use a UV-resistant top coat and avoid prolonged exposure to sunlight.
- Bubbles: Bubbles in the acrylic can be caused by improper mixing or application. To prevent bubbles, ensure that you thoroughly mix the acrylic powder and liquid and apply it in thin, even layers.
The Future of Acrylic Nails and OPI
The acrylic nail industry continues to evolve, with ongoing innovations in formulations, application techniques, and design options. OPI remains at the forefront of this evolution, constantly developing new products and technologies to meet the changing needs of nail professionals and enthusiasts. As trends shift and consumer preferences evolve, OPI is poised to continue its legacy of excellence in the world of nail enhancements.
Conclusion
An OPI acrylic nail kit is a valuable investment for anyone looking to create beautiful, durable, and customizable nail enhancements. With its high-quality products, extensive color range, and easy-to-use formulations, an OPI kit empowers you to achieve salon-quality results in the comfort of your own home or in a professional setting. By following the tips and techniques outlined in this guide, you can master the art of acrylic nails and express your unique style with confidence. Whether you’re a seasoned nail technician or a beginner exploring the world of nail enhancements, an OPI acrylic nail kit is a reliable and rewarding choice. Investing in a quality OPI acrylic nail kit ensures that you have the necessary tools and materials to create stunning nail designs that last. The durability and versatility of acrylic nails, combined with the reputation of the OPI brand, make this a worthwhile investment for anyone serious about nail care and aesthetics. The key to successful acrylic application lies in understanding the products, mastering the techniques, and practicing consistently. An OPI acrylic nail kit provides the foundation for achieving professional-looking results, allowing you to experiment with different styles and express your creativity. Furthermore, the ease of use and availability of resources make it accessible to both beginners and experienced users. The long-lasting nature of acrylic nails, coupled with the wide range of colors and finishes offered by OPI, ensures that your investment will continue to pay off over time. Finally, remember that proper maintenance and care are essential for preserving the beauty and integrity of your acrylic nails. Regular fills, gentle handling, and proper removal techniques will help to extend the life of your manicure and keep your natural nails healthy. With an OPI acrylic nail kit and a commitment to quality, you can achieve flawless and fashionable nails that enhance your overall appearance.
[See also: Related Article Titles]

