Unlocking the Secrets of Fluid Acrylic Pouring Cells: A Comprehensive Guide
Fluid acrylic pouring is a captivating art form that allows artists to create stunning, abstract compositions with vibrant colors and mesmerizing patterns. One of the most sought-after effects in fluid acrylic pouring is the formation of cells – distinct, often rounded areas of color that appear to float within the paint. These cells add depth, texture, and visual interest to the artwork, making it truly unique. This comprehensive guide will delve into the techniques, materials, and troubleshooting tips needed to consistently achieve beautiful fluid acrylic pouring cells.
Understanding Fluid Acrylic Pouring and Cells
Fluid acrylic pouring involves mixing acrylic paints with various mediums to thin their viscosity, allowing them to flow freely across a surface. When different densities of paint are layered and manipulated, they interact to create interesting effects. Cells, in particular, are formed due to differences in density and surface tension between the paints. The heavier, denser paints sink below the lighter ones, pushing the lighter colors upwards and creating the cell-like structures.
The formation of cells in fluid acrylic pouring is influenced by several factors, including:
- Paint Consistency: The ratio of paint to pouring medium is crucial.
- Mediums Used: Different mediums affect the paint’s flow and drying time.
- Color Pigments: Some pigments are naturally heavier than others.
- Pouring Technique: The way the paint is poured and manipulated impacts cell formation.
- Surface Preparation: A properly prepared surface ensures even flow and adhesion.
Essential Materials for Fluid Acrylic Pouring Cells
To embark on your fluid acrylic pouring journey and create captivating cells, you’ll need the following materials:
- Acrylic Paints: High-quality acrylic paints are essential. Experiment with different brands and colors to find your favorites.
- Pouring Medium: This thins the paint and ensures proper flow. Popular options include Liquitex Pouring Medium, Floetrel, and GAC 800.
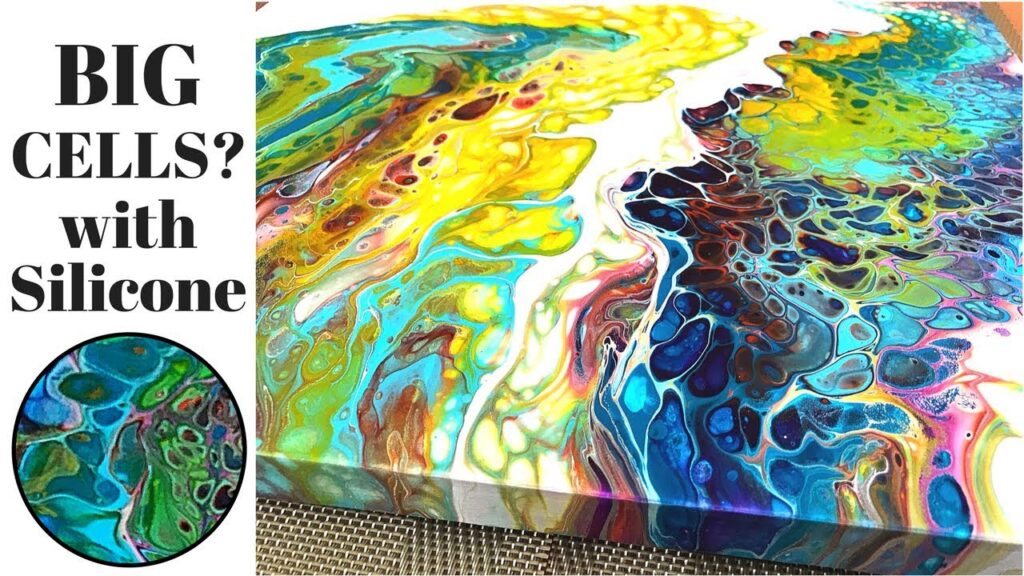
- Silicone Oil: A key ingredient for cell formation. A few drops of silicone oil added to specific colors will encourage the formation of distinct cells. Dimethicone or silicone-based hair serum can also be used.
- Canvas or Board: Choose a sturdy surface that can withstand the weight of the paint. Pre-stretched canvases or wooden boards are ideal.
- Cups and Stir Sticks: For mixing the paints with the pouring medium and silicone oil.
- Torch or Heat Gun: To remove air bubbles and further encourage cell formation.
- Leveling Surface: Ensure your canvas is perfectly level to prevent uneven paint distribution.
- Drop Cloth or Protective Covering: To protect your work area from spills.
- Gloves: To protect your hands from the paint.
Techniques for Achieving Fluid Acrylic Pouring Cells
Several techniques can be employed to create cells in fluid acrylic pouring. Here are some popular methods:
The Dirty Pour
The dirty pour involves layering different colors of paint into a single cup and then pouring the entire mixture onto the canvas. This technique creates a dynamic and unpredictable mix of colors and cells. Add a few drops of silicone oil to one or two of the colors before layering them into the cup. The silicone oil will cause those colors to separate and form cells as they interact with the other paints.
The Flip Cup
Similar to the dirty pour, the flip cup involves layering paints into a cup. However, instead of pouring the paint directly onto the canvas, the cup is flipped upside down onto the canvas and allowed to sit for a few minutes. Then, the cup is slowly lifted, allowing the paint to flow out and create interesting patterns and cells. Again, silicone oil is key to encouraging cell formation.
The Puddle Pour
The puddle pour involves pouring individual puddles of different colors onto the canvas. These puddles can then be tilted and manipulated to create various effects. This technique allows for more control over color placement and cell formation. Adding a small amount of silicone oil to some of the puddles before tilting the canvas will help create distinct cells.
The Swipe Technique
The swipe technique involves pouring paint onto the canvas and then using a tool (such as a palette knife, paper towel, or plastic sheet) to swipe across the surface, creating a layered effect and revealing the colors underneath. This technique can create dramatic cells and interesting textures. A thin layer of a base color mixed with silicone oil is often used as the foundation for the swipe.
Troubleshooting Common Issues in Fluid Acrylic Pouring Cells
While fluid acrylic pouring can be incredibly rewarding, it’s not without its challenges. Here are some common issues and how to address them:
- Lack of Cells: This is often due to insufficient silicone oil or incorrect paint consistency. Ensure you’re using enough silicone oil in at least one of your colors and that your paint is properly thinned with pouring medium.
- Too Many Cells: Excessive silicone oil can lead to an overwhelming number of small cells. Reduce the amount of silicone oil used.
- Cracking: Cracking can occur if the paint layer is too thick or if the drying process is too rapid. Thin the paint further with pouring medium and allow the artwork to dry slowly in a cool, dry place.
- Muddy Colors: Overmixing the paints or using too many colors can result in muddy colors. Avoid overmixing and limit your color palette.
- Uneven Surface: An uneven surface can cause the paint to flow unevenly. Ensure your canvas is perfectly level before pouring.
- Air Bubbles: Use a torch or heat gun to remove air bubbles from the surface of the paint. Be careful not to overheat the paint, as this can cause it to crack.
Tips for Success in Fluid Acrylic Pouring Cells
Here are some additional tips to help you achieve success in fluid acrylic pouring and create stunning cells:
- Experiment with Different Mediums: Different pouring mediums will produce different results. Experiment to find the ones that work best for you.
- Use High-Quality Paints: High-quality paints will provide better color saturation and consistency.
- Practice Your Pouring Technique: Practice makes perfect. Experiment with different pouring techniques to find the ones you enjoy and that produce the desired results.
- Don’t Be Afraid to Experiment with Colors: Try different color combinations to see what works best.
- Keep a Record of Your Experiments: Note the materials, techniques, and results of each experiment so you can learn from your successes and failures.
- Be Patient: Fluid acrylic pouring takes time and patience. Don’t get discouraged if you don’t get the results you want right away. Keep practicing, and you’ll eventually master the art of creating beautiful cells.
- Safety First: Always work in a well-ventilated area and wear gloves to protect your hands.
Advanced Techniques and Considerations
Once you’ve mastered the basics of fluid acrylic pouring cells, you can explore more advanced techniques, such as:
- Resin Coating: Applying a clear epoxy resin coating to your finished artwork will enhance the colors and create a glossy, durable finish.
- Adding Texture: Incorporate other materials, such as sand, glitter, or glass beads, to add texture to your artwork.
- Creating Specific Shapes: Use masking tape or stencils to create specific shapes and patterns in your artwork.
- Combining Techniques: Experiment with combining different pouring techniques to create unique and complex effects.
Consider the environmental impact of your art practice. Properly dispose of paint and cleaning supplies to minimize waste and pollution. Explore eco-friendly options for your materials whenever possible.
The Allure of Fluid Acrylic Pouring Cells
The appeal of fluid acrylic pouring cells lies in their unpredictable nature and the stunning visual effects they create. Each pour is unique, resulting in a one-of-a-kind artwork that reflects the artist’s vision and the inherent properties of the materials used. The mesmerizing patterns and vibrant colors of the cells draw the viewer in, inviting them to explore the depths of the abstract composition.
Fluid acrylic pouring is more than just a technique; it’s a form of self-expression, a way to unleash creativity and explore the endless possibilities of color and texture. Whether you’re a seasoned artist or a beginner, the art of fluid acrylic pouring offers a rewarding and captivating experience. The key to success is experimentation, patience, and a willingness to embrace the unexpected. So, gather your materials, explore the techniques, and unlock the secrets of creating breathtaking fluid acrylic pouring cells. [See also: Acrylic Paint Pouring Techniques for Beginners] [See also: Best Pouring Mediums for Acrylic Paint]
The process of achieving beautiful fluid acrylic pouring cells can be a journey of discovery, filled with experimentation and unexpected results. Embrace the learning process, celebrate your successes, and learn from your challenges. With practice and patience, you’ll develop your own unique style and create stunning abstract masterpieces that showcase the captivating beauty of fluid acrylic pouring cells.

